

![]()
PHONE
(909) 988-3400
![]()
ADDRESS
541 E. Main St.
Ontario, CA 91761
Lion Premium Grills Newsletter – No. 53, February 2018
____
Welcome to the February 2018 edition and 53rd issue of our monthly newsletter! Thank you for visiting, we hope you enjoy this jam-packed issue. We are quickly approaching that time of year where people are already preparing their grilling set-ups for the encroaching warmer months; cleaning and servicing their grills, renovating their backyards, and so on. With that in mind, we have quite a few features lined up for this edition which we’ll break down below.
Here’s what we have lined up for this issue of the Lion Newsletter. Kicking things off we have an in-depth feature that breaks down the advantages from using 16 gauge stainless steel which is what we utilize throughout our product line. Following that is a recipe for a classic — the grilled bone-in ribeye steak — which is one of our absolute favorites. We also have a feature that goes into detail on how to properly clean and maintain your grill and another that breaks down how you should check your gas connections before firing up your grill after an extended period of non-use. We also have a brief Before and After feature in this issue. We would all like to thank you for taking the time to check out our products — we hope you enjoy!
____
ARCHIVE#1 - Oct 2013 #2 - Nov 2013#3 - Dec 2013#4 - Jan 2014#5 - Feb 2014#6 - March 2014#7 - April 2014#8 - May 2014#9 - June 2014#10 - July 2014#11 - August 2014#12 - Sept 2014#13 - Oct 2014#14 - Nov 2014#15 - Dec 2014#16 - Jan 2015#17 - Feb 2015#18 - March 2015#19 - April 2015#20 - May 2015#21 - June 2015#22 - July 2015#23 - Aug 2015#24 - Sept 2015#25 - Oct 2015#26 - Nov 2015#27 - Dec 2015#28 - Jan 2016#29 - Feb 2016#30 - March 2016#31 - April 2016#32 - May 2016#33 - June 2016#34 - July 2016#35 - Aug 2016#36 - Sept 2016#37 - Oct 2016#38 -Nov 2016#39 - Dec 2016 #40 - Jan 2017#41 - Feb 2017#42 - March 2017#43 - April 2017#44 - May 2017#45 - June 2017#46 - July 2017#47 - Aug 2017#48 - Sept 2017#49 - Oct 2017#50 - Nov 2017#51 - Dec 2017#52 - Jan 2018
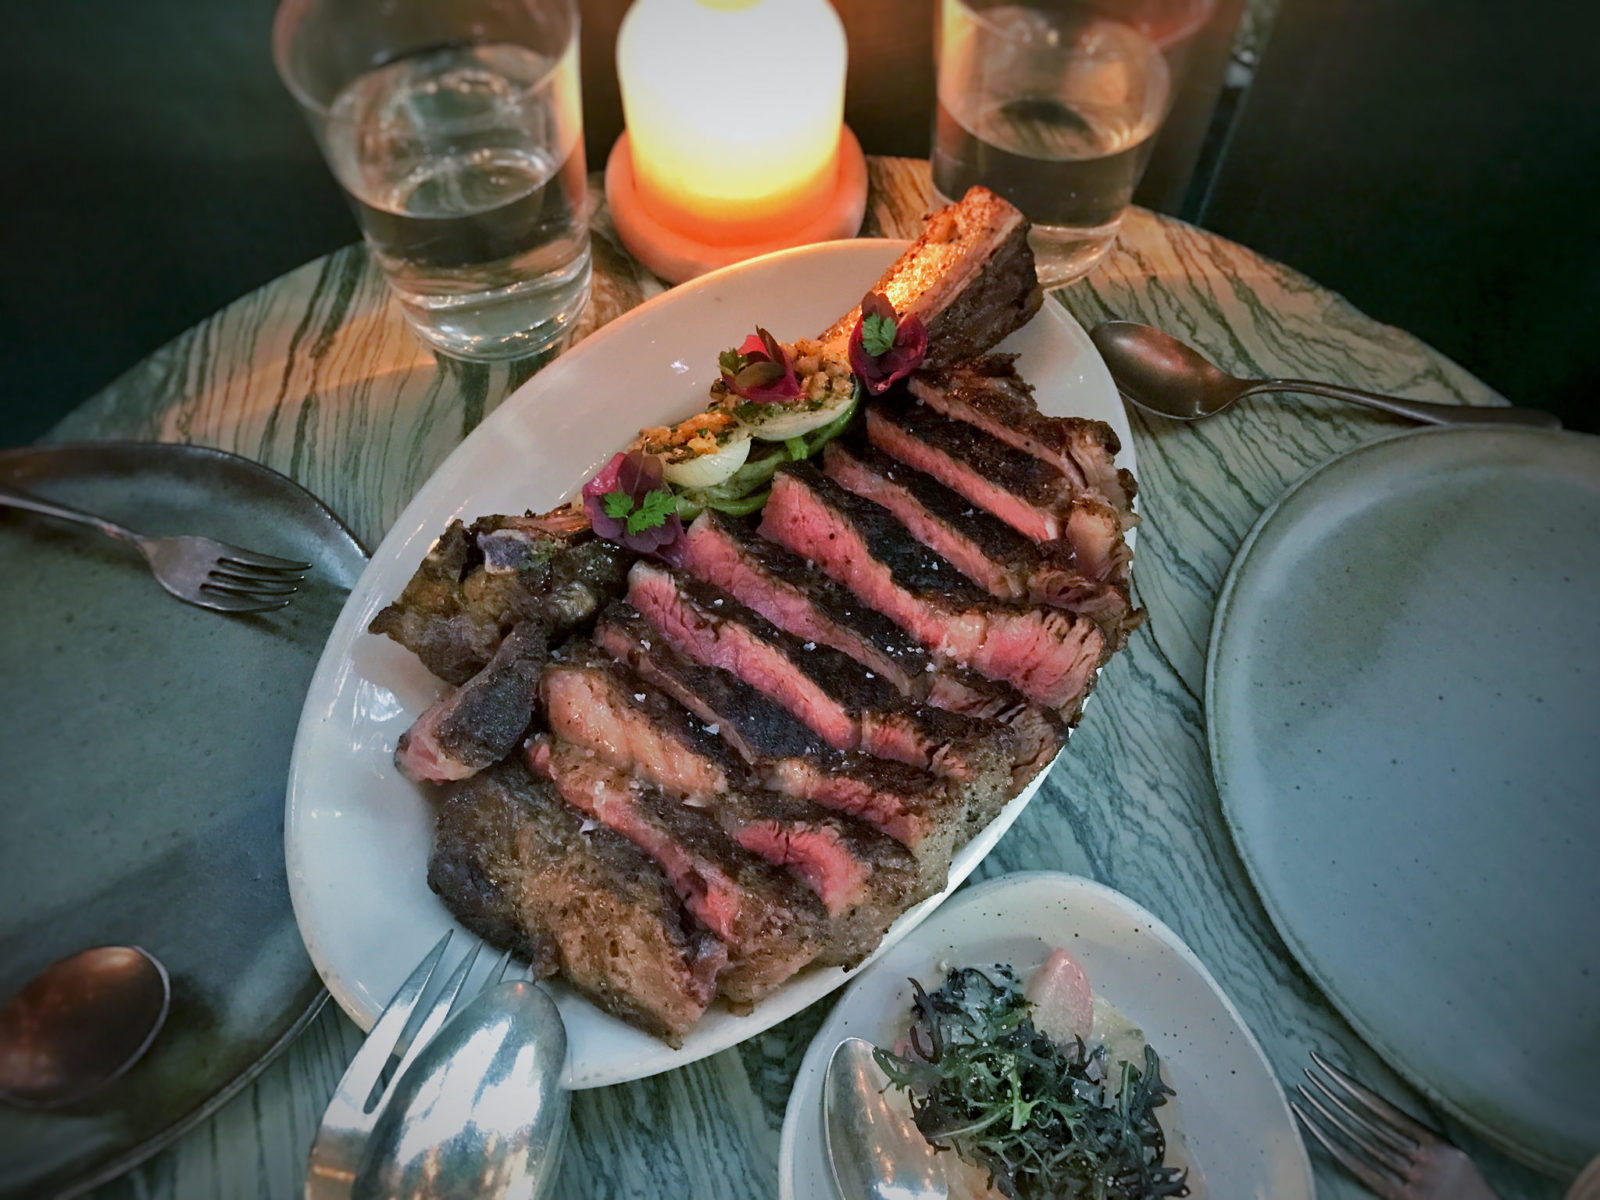
INGREDIENTS
Four bone-in rib steaks
2 tbsp. vegetable oil
Emeril’s Original Essence or Creole Seasoning
Kosher salt
Freshly ground black pepper
2 1/2 tablespoons paprika
2 tablespoons salt
2 tablespoons garlic powder
1 tablespoon black pepper
1 tablespoon onion powder
1 tablespoon cayenne pepper
1 tablespoon dried oregano
1 tablespoon dried thyme
DIRECTIONS
It’s a given that keeping a well maintained gas BBQ grill and cleaning it regularly will keep it in tip top condition for years to come. One of our goals was to also ensure that any type of clean-up, whether it be the grids or the burners, was quick and relatively easy. We would like to provide some quick tips for maintaining a beautiful BBQ grill.
Before you start it is ESSENTIAL that you make sure that the fuel line to the grill is disconnected. Please also make sure that any of the control knobs on the grill for any of the individual burners are off! This is EXTREMELY IMPORTANT and must be followed to ensure your safety and security when cleaning any of the grill burners. In this case, accidents can be avoided, just please take the proper precautions. Once this is complete, the process can begin. Remove the cooking grids and extract the burners carefully from the orifice they’re set in. We recommend using a wire brush to clean the burners off. Slosh off all of the caked food matter, oils, grease, etc. that coat the outer layer of the burner with the brush; try to clean up/out any of the flame ports on the burners as some most likely will be clogged which reduces burner performance. If the burner looks to be damaged do not continue to use it; you will need to order a new one. If everything is fine, place the clean burner back into place and re-attach the gas valve orifices.
Cleaning the flame tamer is a cinch; it does not need to be cleaned after every usage of the grill, just please regularly check to see if the tamers need to be cleaned. When it’s time to clean, the process is really easy. Remove the cooking grids and take out the flame tamers from their original position. Prepare your wire brush along with a solution made of soup and warm water. Soften the various residue and caked on gunk with the brush; you may scrub vigorously. Once finished, please all the flame tamer to dry completely before placing it back into position in the grill.
It is recommended that you clean your cooking grids very regularly; it’s preferential to do so after a few usages of the grill. Make sure that the cooking grids have had time to cool off. Once they have you can gently remove them from the grill itself. You can submerge them in a soap and warm water solution and gently use a warm wash cloth to clean off any particles or residue that remains.
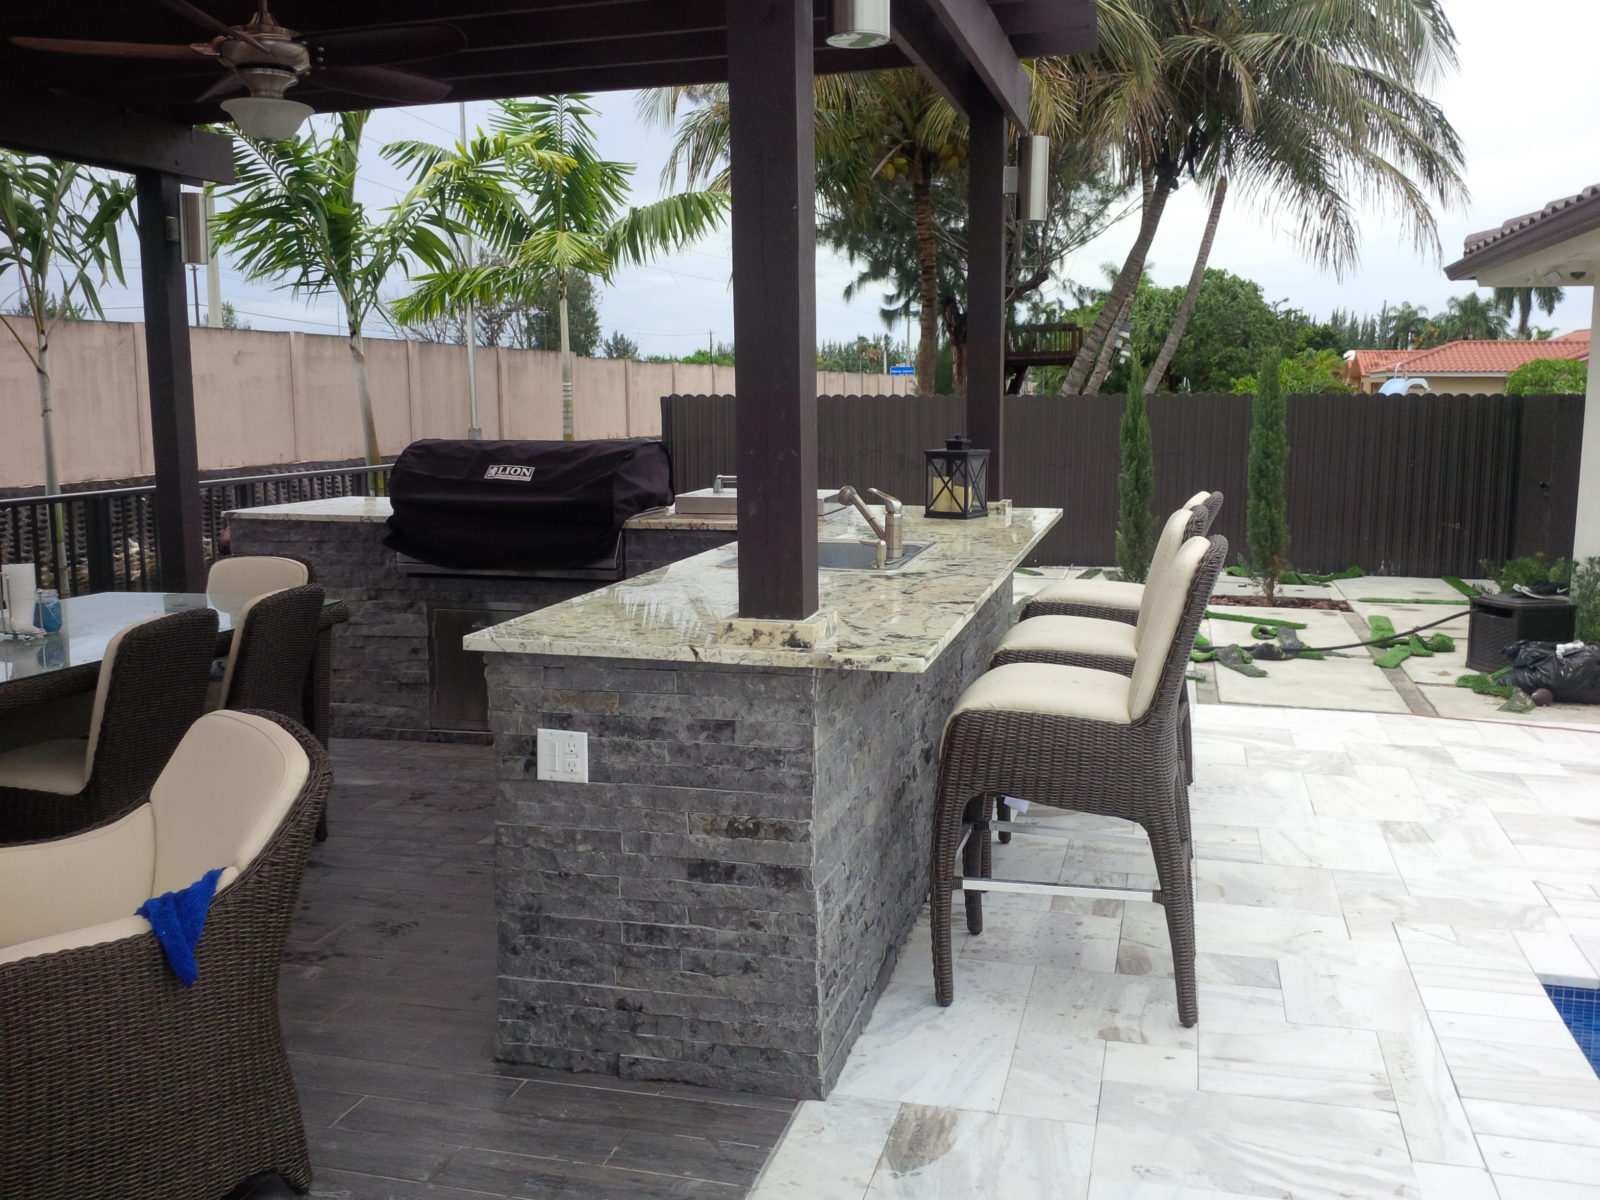
We enjoy showcasing our customer’s backyards after they’ve switched out their old grill with our Lion model. Below you’ll find an example of what we’re talking about; the first image shows the customer’s old grill that while functional looks to be due for a replacement. The design is outdated as you can see; the angular, box-like appearance does not hold a candle to the clean and sleek design of our Lion 40″ 5-burner grill which is in the second picture. The appearance of our grill as well as the performance vastly outmatches the old model that this customer was using; just the addition of it to this bbq island completely renews the entire visual appearance of the entire unit.
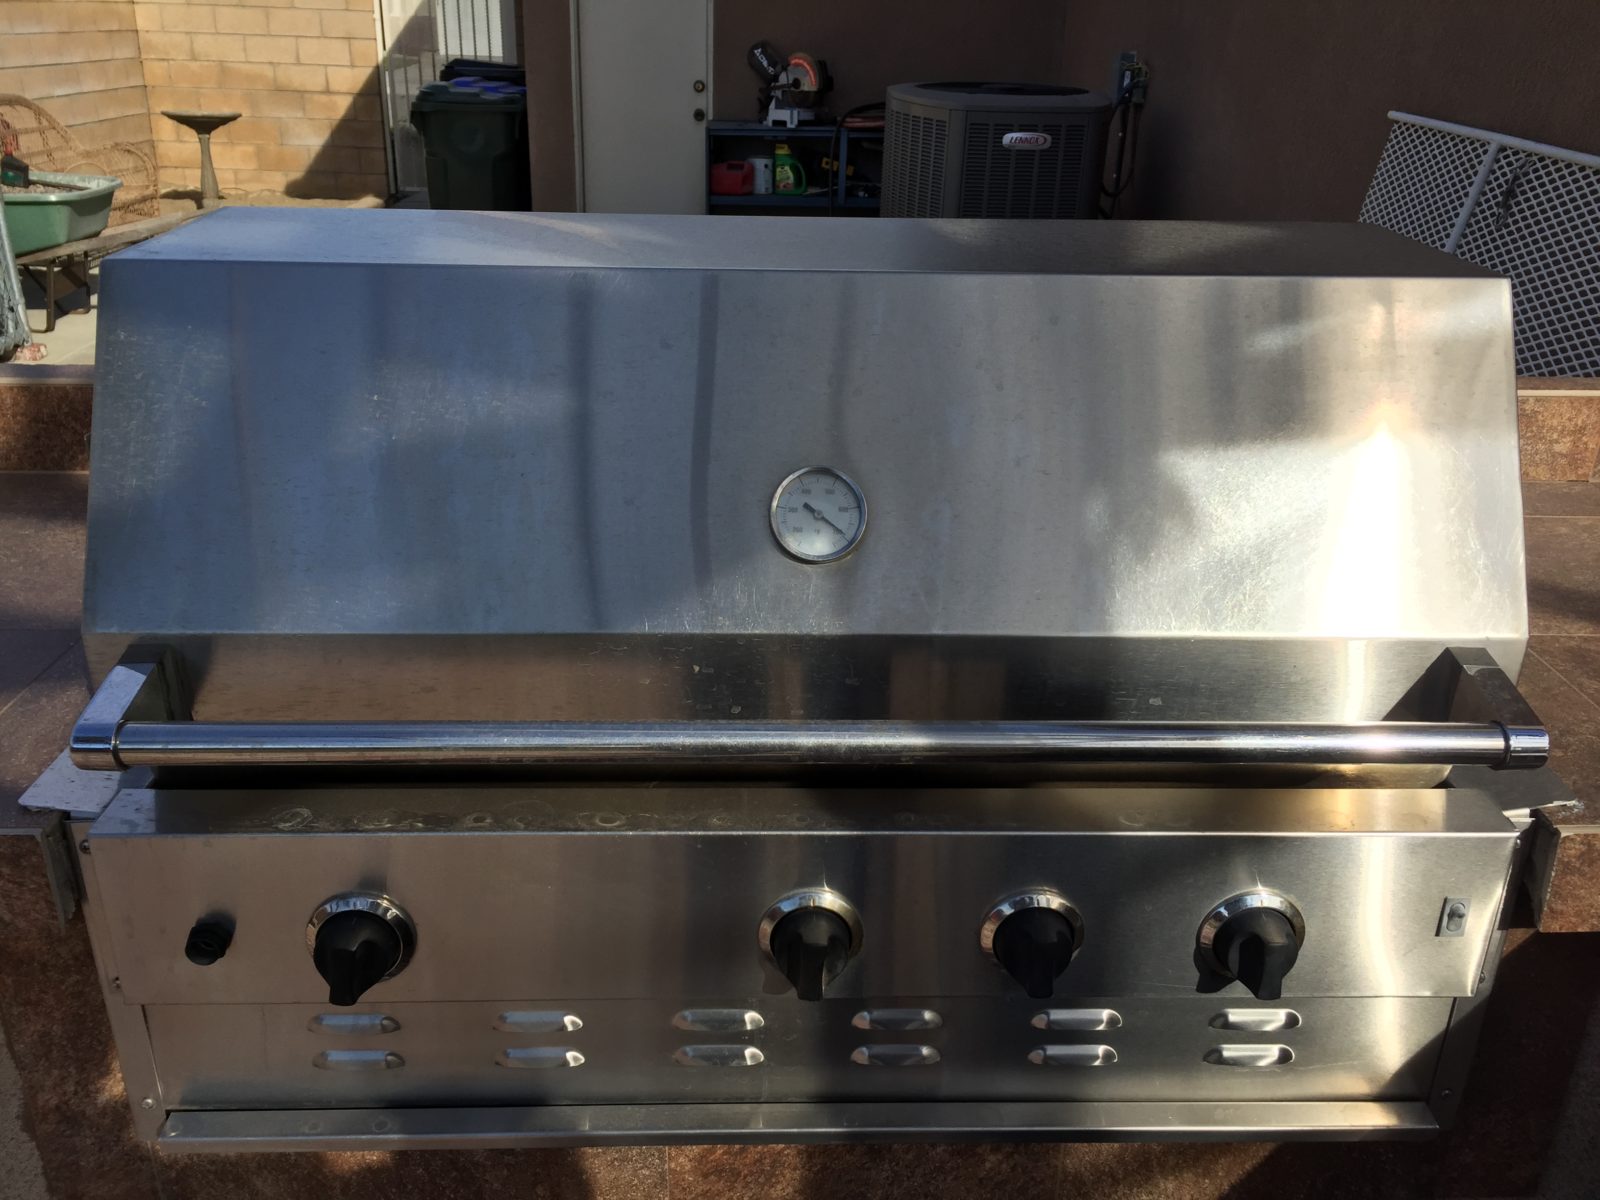
This is the customer’s old grill that was being replaced.
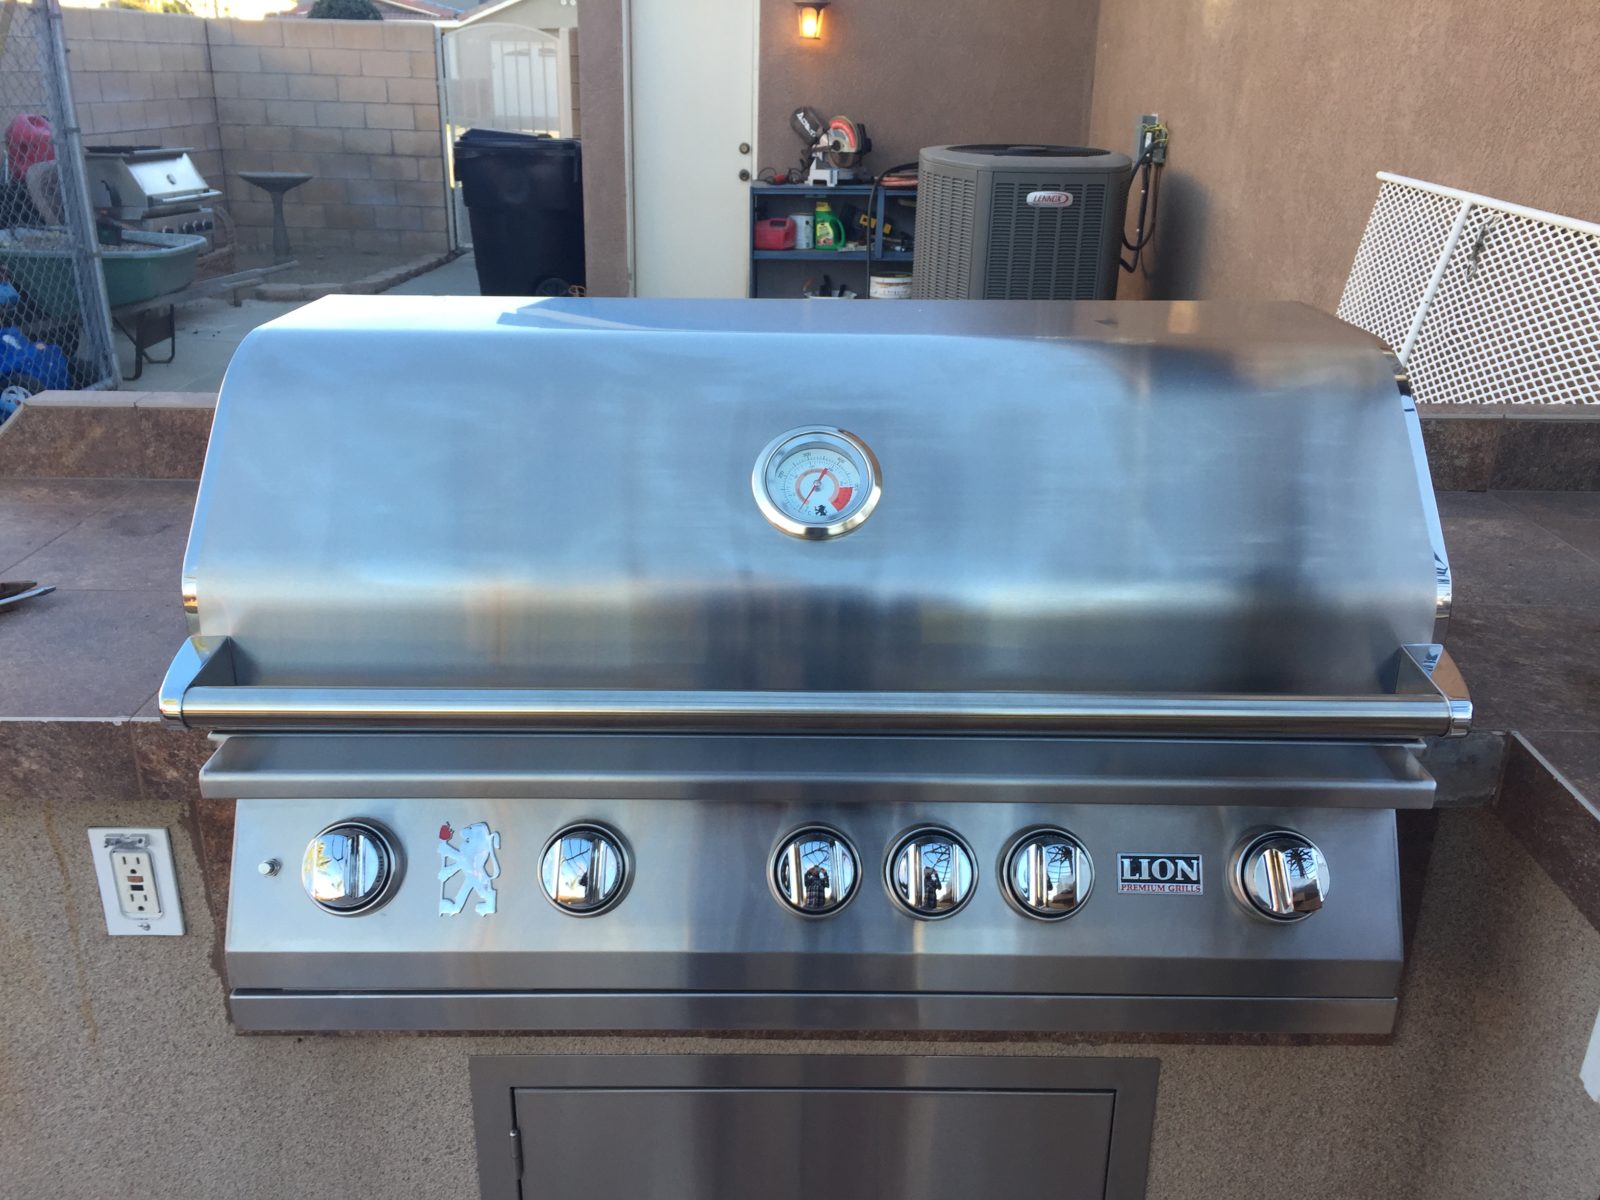
This is after the addition of our Lion L90000 40″ grill.
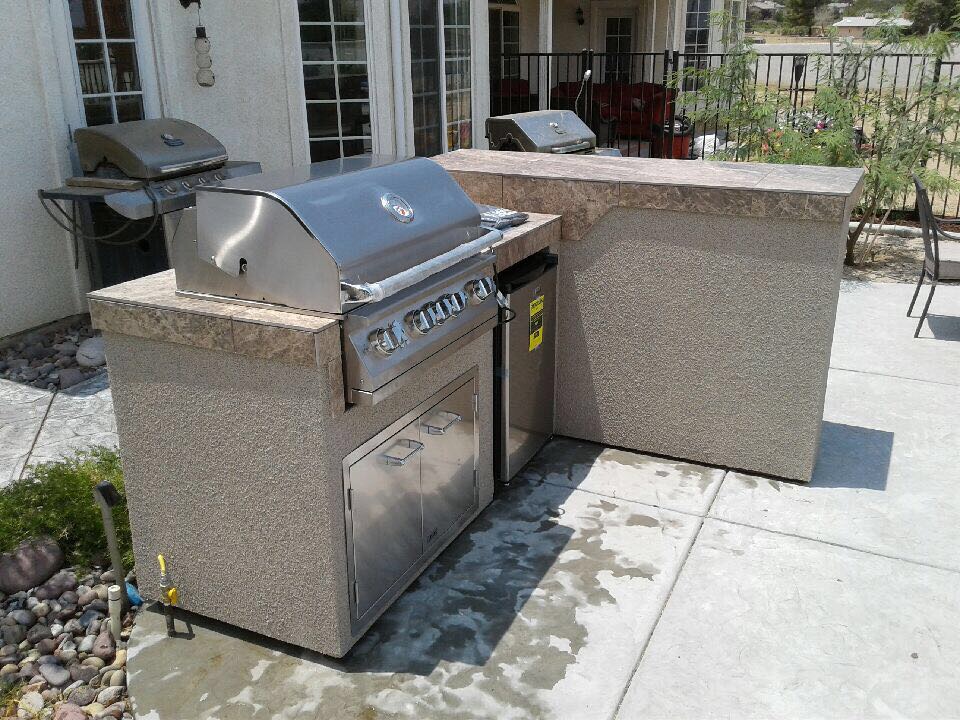
Island by Outdoor Entertainment Designs @ Ontario, CA
Professional Cooking Tool
“Having installed the Lion L75000 3 weeks ago, and using it every day since here are my observations. 1) The Natural Gas connection is on the rear bottom left of the unit. 2) The light connection is on the rear bottom right of the unit. 3) The grill with all options in the box weigh about 200 pounds but the grill can easily be picked up and installed with two semi-strong people. 4) The oven can go from zero to 450 degrees in about 6 minutes with all burners on High. 5) The burner knobs are marked “OFF” “PUSH TO TURN” “HIGH” “LOW”. Thank goodness the designer of this unit trusted the user to figure out that “MEDIUM” is between HIGH and LOW, I do appreciate that. 6) The double wall cover is touchable while the over temp is 300 degrees or less. Even at 450 degrees you won’t burn yourself. 7) The black fabric cover fits quite nicely around the oven. Not messy looking. 8) If there are any “HOT” spots on the cooking surface, I’ve not found them yet. 9) Complaints that the grill bars are too far apart are not true. I’ve not lost any food between the grill bars. 10) The Lion L75000 is all Stainless Steel. The outside cleans best with Stainless Steel cleaner. And it does look sharp. 11) The instructions are very clear. 12) Each burner started the first time we used it and every time since. 5 STAR GRILL.”
Steve Turner
Santa Fe, New Mexico – 32″ L75000 Grill– shopperschoice.com
[testimonial name=”Andrew – www.bestofbackyard.com” image=”http://lionbbq.com/wp-content/uploads/blank.png”]”I recently renovated my backyard and was looking for a suitable grill for my outdoor kitchen. I did some research and liked what I read about Lion’s grills in comparison to some of these other brands so I went ahead and bought the L75000 model. When I finally got it I was super impressed by the quality. It’s very heavy duty and solid, it doesn’t feel flimsy or cheap. It’s just a great grill and I can’t say enough about how happy I am with it. Thanks to Lion for making a product that I can feel proud to show off!”
[/testimonial]
